New York Black-and-White Cookies Recipe
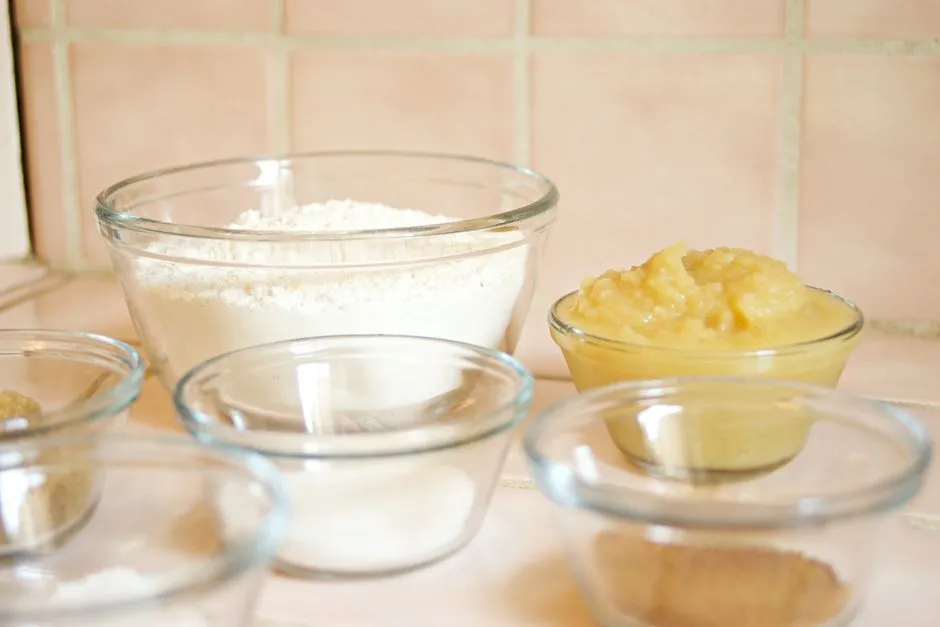
- A black-and-white cookie is cake wearing a cookie label
- Ingredients for 12 large cookies
- Prepare two trays and one scoop
- Mix a thick, smooth batter
- Scoop for round cookies, not perfect circles
- Make one vanilla icing, then split it
- Ice the flat side in two passes
- Fix the four common problems
- Store them without gluing the tops together
- Sources
A black-and-white cookie is cake wearing a cookie label
These New York-style black-and-white cookies have a soft, fine, lemon-vanilla crumb and two smooth icings across the flat side. The recipe makes 12 large cookies, each about 4 inches (10 cm) wide. They bake as thick rounds rather than crisp discs, which is why the first bite feels closer to a small cake.
Allow about 25 minutes to mix, 14–17 minutes to bake each tray, 30 minutes to cool, and another 30 minutes for the icing to set. Use the flat bottom as the decorated face. The domed side becomes the base, a tiny architectural decision that prevents icing from attempting a downhill commute.
Ingredients for 12 large cookies
Lemon-vanilla cookie base
- 2½ cups (300 g) all-purpose flour
- 1 tsp baking powder
- ½ tsp baking soda
- ½ tsp fine salt
- 10 tbsp (142 g) unsalted butter, softened but not greasy
- 1 cup (200 g) granulated sugar
- 2 large eggs, at room temperature
- 2 tsp vanilla extract
- 1 tsp finely grated lemon zest
- ½ cup (120 g) sour cream, at room temperature
- ¼ cup (60 ml) whole milk, at room temperature
Vanilla and chocolate icing
- 3 cups (360 g) confectioners’ sugar, sifted
- 2 tbsp (14 g) natural unsweetened cocoa powder, sifted
- 2 tbsp (30 ml) light corn syrup
- 1 tsp vanilla extract
- ¼ tsp fine salt
- 5–7 tbsp (75–105 ml) just-boiled water, divided
The cookies contain wheat, milk, and egg. Ingredient labels can introduce other allergens or cross-contact risks, so check the specific flour, chocolate, dairy, flavouring, and decorations used for the people eating them. Do not assume a substitution is safe for an allergy because it is labelled plant-based or gluten-free.
Prepare two trays and one scoop
Heat the oven to 350°F (175°C), with racks in the upper and lower thirds. Line two large baking sheets with parchment. Do not grease the parchment; extra fat encourages more spread.
Use a ¼-cup (60-ml) measure or a 2-ounce cookie scoop. Twelve equal portions matter because very different sizes will finish at different times. Leave at least 3 inches (7.5 cm) between portions.
Whisk the flour, baking powder, baking soda, and salt together for 20 seconds. This distributes the small amounts of leavener before they meet the wet batter. A pocket of baking soda is a surprisingly efficient way to make one bite memorable for all the wrong reasons.
Mix a thick, smooth batter
Beat the softened butter and sugar on medium speed for 2–3 minutes, until paler and slightly fluffy. Scrape the bowl and beater. Add the eggs one at a time, beating until each disappears before adding the next. Mix in vanilla and lemon zest.
Stir the sour cream and milk together. Add one-third of the flour mixture to the butter mixture on low speed, followed by half the sour-cream mixture. Repeat, then finish with the last third of flour. Stop as soon as no dry streaks remain.
The batter should be thicker than cake batter but softer than roll-out cookie dough. It should mound from the scoop and slowly relax. If it runs across the tray, the butter may be too warm. Refrigerate the bowl for 15 minutes, then portion it.
The U.S. Food and Drug Administration notes that most flour is raw and may contain harmful bacteria. Do not taste the raw batter. Wash hands, bowls, beaters, counters, and scoops after they touch flour, raw egg, or batter.
Scoop for round cookies, not perfect circles
Divide the batter into 12 portions, six per tray. Use the back of a damp spoon to nudge each mound into a round about 2½ inches (6 cm) wide and ¾ inch (2 cm) high. Smooth only obvious peaks. The batter will spread into a wider circle in the oven.
Bake both trays for 14–17 minutes, swapping the trays from top to bottom and rotating them front to back after 8 minutes. The edges should look set and barely golden. The tops should spring back when lightly touched, and a toothpick in the centre should emerge without wet batter.
Do not wait for deep browning. A dark edge means the cake-like crumb is already drying. If your oven browns one tray much faster, bake one tray at a time on the centre rack rather than asking parchment to negotiate with a hot spot.
Cool the cookies on their trays for 5 minutes, then move them to a rack. Let them cool completely before icing. Warm cookies melt the glaze and make a neat dividing line largely theoretical.
Make one vanilla icing, then split it
Put the sifted confectioners’ sugar, corn syrup, vanilla, salt, and 5 tablespoons (75 ml) just-boiled water in a heatproof bowl. Whisk until completely smooth. The icing should fall from the whisk in a thick ribbon that settles into the surface in about 8 seconds.
If it is too stiff to spread, add hot water ½ teaspoon at a time. If it runs like milk, sift in confectioners’ sugar 1 tablespoon at a time. Small adjustments matter. The difference between glossy icing and a puddle is often less water than fits in a confident splash.
Transfer a little less than half of the vanilla icing to a second bowl. This smaller portion stays vanilla because cocoa will increase the volume of the other half.
Whisk the cocoa into the larger portion. Add hot water ½ teaspoon at a time until the chocolate icing matches the vanilla icing’s ribbon consistency. Matching flow matters more than forcing both bowls to use the same amount of water.
Ice the flat side in two passes
Turn every cookie flat-side up on the rack. Slide parchment underneath to catch drips.
Spread vanilla icing over one half of each cookie, drawing a straight line through the centre and pushing icing close to the edge without sending it over. Let the vanilla side stand for 10–15 minutes, until its surface begins to set.
Spread chocolate icing over the open half, meeting the vanilla line. If either icing develops a skin in the bowl, whisk it briefly. Add only a few drops of hot water if necessary.
Leave the finished cookies flat-side up for 25–35 minutes, until the icing no longer transfers to a fingertip touched lightly at the edge. Humidity and icing thickness change the setting time. Stacking early converts twelve cookies into one ambitious layered dessert.
Fix the four common problems
The cookies spread too thin
The butter was likely too warm, the flour was under-measured, or the batter sat near the hot oven. Weigh the flour, use butter that dents under a finger without looking oily, and chill a loose batter for 15 minutes. Never add a casual handful of flour after half the batch has spread; test one cookie first.
The cookies are dry
They baked too long or were portioned too small. Pull them when the edges are set and only lightly coloured. Keep all 12 portions equal and use the toothpick cue rather than waiting for a biscuit-like surface.
The icing disappears into the cake
The cookies were warm or the icing was too thin. Cool the cookies completely and adjust the glaze until a ribbon takes about 8 seconds to settle. Spread, rather than pour, each half.
The dividing line looks untidy
Let the vanilla half begin to set before adding chocolate. Work from the centre line toward the outer edge with a small offset spatula or the back of a teaspoon. The line should be deliberate, not mathematically audited. It will be eaten.
Store them without gluing the tops together
Let the icing set fully before moving the cookies. Store them in a single layer in an airtight container in the refrigerator, or place parchment between layers without pressing on the icing. Bring them toward room temperature before serving for the softest crumb.
For best texture, make them no more than two days ahead. That is our quality window, not an official safety limit. If dairy or egg storage guidance in your jurisdiction is stricter, follow it.
Freeze uniced cookies in an airtight container for up to one month for best quality. Thaw them still wrapped so condensation forms on the wrapping rather than the cake, then ice once they reach room temperature.
Serve these after pizza night alongside the guide to New York-style pizza, or put them on a wider city-food table with the iconic New York foods overview. For another home-baked New York classic, the New York cheesecake takes the slow, creamy route.
The recipe’s useful sequence is simple: keep the batter thick, bake only to a pale set edge, cool completely, match the two icings by consistency, and decorate the flat side. Half vanilla and half chocolate is the visual rule. Taking one of each is just arithmetic.
Sources
- U.S. Food and Drug Administration: Flour Is a Raw Food and Other Safety Facts — current guidance that most flour is raw, baking kills bacteria that may be present, and raw flour, dough, and batter should not be tasted.
- U.S. Food and Drug Administration: Food Allergies — current U.S. list of nine major food allergens and explanation of allergen cross-contact.